Whether you’re a seasoned music maker or a budding home producer, mastering the art of home recording can seem daunting. But fear not! This comprehensive guide is tailored just for you, packed with essential techniques, practical setup advice, and key gear recommendations to elevate your recordings to professional levels. From understanding crucial recording techniques like gain staging and mic placement to designing a soundproof home studio, we’ll walk you through the ins and outs of creating high-quality audio right in your living room. Ready to transform your musical vision into reality? Let’s dive in!
Home Recording Techniques: Essential Methods for Success
Achieving high-quality audio in your home studio hinges on mastering a few key recording techniques.
Gain staging is crucial; it refers to the optimization of audio signal levels throughout the recording chain. Start by adjusting your microphone preamp levels to avoid clipping while ensuring an adequate signal is captured. Aiming for levels peaking around -12 dBFS to -6 dBFS is a good guideline.
Mic placement is another vital factor. Experimenting with distance and angle can significantly change how instruments and vocals are captured. For vocals, positioning the mic about six inches away with a slight angle can reduce plosive sounds. For instruments, try different placements to find where the sound resonates best.
EQ usage during recording can shape your desired tone right from the start. Cutting unnecessary low frequencies, for example, can clear up space in the mix and enhance the clarity of vocals or certain instruments.
Here are additional tips to enhance your sound quality:
Use a pop filter when recording vocals to reduce plosive sounds.
Monitor while recording using good quality headphones or studio monitors to catch any issues in real time.
Record at a higher bit depth and sample rate to ensure better quality, even if you plan to downsample later.
Take breaks to keep your ears fresh, as fatigue can lead to poor mixing decisions.
Implementing these techniques and tips can significantly improve your home recording quality, allowing you to create polished tracks that stand out.
Home Studio Setup: Designing Your Creative Space
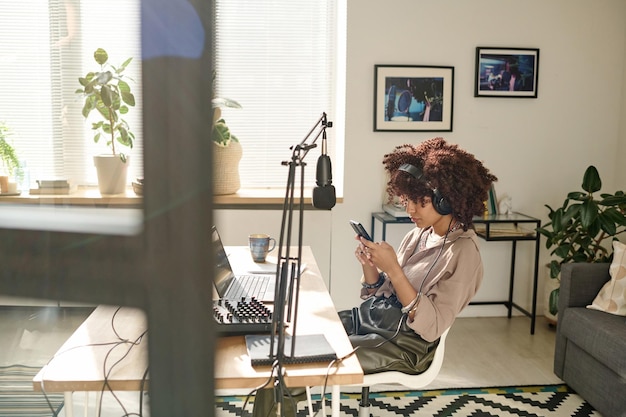
Designing your home studio is crucial for facilitating creativity and optimizing recording quality. Start by selecting the right space, ideally a room with minimal outside noise.
Soundproofing solutions are essential in this regard. Consider adding heavy curtains, carpets, or even acoustic panels to help absorb sound.
The arrangement of your equipment also plays a pivotal role in how effectively you can work. Placing your computer and audio interface at a comfortable height can prevent strain during long sessions. Ensure that your monitors are at ear level and angled towards your listening position for a more accurate sound.
Key components of a home studio setup include:
Audio Interface: Connects your instruments and microphones to your computer. Look for one with sufficient inputs and outputs to suit your needs.
Microphones: Choose appropriate mics for your recording needs, whether dynamic or condenser, based on what you intend to capture.
Studio Monitors: Invest in quality monitoring speakers to get an accurate representation of your mix.
Cables and Stands: Ensure you have high-quality cables for minimal signal loss and sturdy stands for optimal mic placement.
Digital Audio Workstation (DAW): Select a DAW that suits your workflow. Familiarity with your DAW will make recording and editing processes smoother.
Consider the role of room acoustics in achieving optimal sound quality. Using bass traps in corners and foam panels on walls can drastically reduce unwanted reflections, resulting in clearer audio.
Organize your studio in a way that inspires you creatively. Personal touches like artwork or mood lighting can enhance your environment.
Ultimately, your setup should reflect your workflow and preferences, making it as accessible and functional as possible to encourage a productive recording atmosphere.
Audio Recording Equipment: What You Need
Achieving professional-level recordings at home begins with understanding the essential audio recording equipment. Having the right tools can dramatically improve sound quality, making it crucial to equip your studio thoughtfully.
Microphone Types for Home Recording
Dynamic Microphones
These are robust and especially suited for loud sound sources such as drums or electric amplifiers. They tend to handle high sound pressure levels well, making them ideal for live settings and home recordings of instruments.Condenser Microphones
Condenser mics are known for their sensitivity and accuracy, making them perfect for capturing subtle details in vocals and acoustic instruments. They often require phantom power, which is usually provided by audio interfaces.
Each microphone type offers unique benefits, so understanding your specific recording needs is vital for selecting the most appropriate tool.
Best Audio Interfaces for Beginners
An audio interface serves as the bridge between your instruments and computer. It translates the sound into a digital format that your Digital Audio Workstation can process. Here are some popular features to consider when selecting an audio interface:
Number of Inputs/Outputs: If you’re recording multiple instruments at once, look for an interface with several inputs.
Quality of A/D Conversion: Good audio quality starts at conversion; choose an interface that provides high-quality analog-to-digital conversion.
Compatibility with DAWs: Make sure the interface is compatible with the recording software you plan to use.
Recommended Entry-Level Interfaces
| Interface | Inputs | Price Range |
|---|---|---|
| Audio Interface A | 2 | $100 – $150 |
| Audio Interface B | 4 | $150 – $200 |
| Audio Interface C | 8 | $200 – $300 |
Investing in quality audio recording equipment is crucial for any home studio setup. With the right microphones and audio interface, you’ll be well on your way to producing high-quality recordings that capture your unique sound.
Mixing and Mastering Tips for Home Recording
Effective mixing and mastering are essential for transforming your recordings into polished final products.
Start by focusing on EQ settings; cut frequencies that muddy the mix and boost those that add clarity and presence.
For vocals, consider a subtle boost in the 3 kHz to 6 kHz range to enhance intelligibility.
Compression is another powerful tool. Use it to control dynamics and maintain a consistent level, but be careful not to over-compress, which can squash the life out of your sound.
Aim for a ratio of 4:1 or lower for vocals, allowing the natural nuances to shine through.
Space in your mix is crucial. Utilize reverb and delay to create depth, positioning elements within the stereo field.
Avoid common mistakes like excessive layering; it can lead to a cluttered mix. Instead, prioritize clarity by allowing each instrument its own sonic space.
Tools like reference tracks can help guide your mixing and mastering process. Compare your project with professionally produced tracks to see how it measures up in terms of balance and overall quality.
When mastering, aim for a loudness level that suits your genre. Use tools like limiters judiciously to prevent distortion, ensuring your mix retains its dynamic range.
Tips for Mixing:
Begin with EQ adjustments to clear up muddiness.
Utilize compression for consistent vocal levels.
Create space with reverb and delay.
Keep layering minimal for clarity.
Tips for Mastering:
Reference professional tracks for guidance.
Use limiters to achieve desired loudness without distortion.
Ensure your mix retains dynamic range.
Implement these tips to enhance your home recordings and get them ready for distribution.
Recording Software Reviews: Choosing the Right DAW
When selecting a digital audio workstation (DAW), it’s crucial to consider various factors like features, user-friendliness, and compatibility with your workflow. Below is an overview of some popular DAWs, highlighting their strengths and best uses.
1. Ableton Live
- Best For: Electronic music producers and live performances.
- Features: Session view for improvisation, strong MIDI capabilities, extensive clip-based workflow.
- User-Friendliness: Intuitive interface, but may require some learning for beginners.
2. FL Studio
- Best For: Beat making and electronic music.
- Features: Pattern-based arrangement, strong plugin support, integrated step sequencer.
- User-Friendliness: Straightforward for newcomers, with a wealth of tutorials available online.
3. Pro Tools
- Best For: Professional studios and audio engineering.
- Features: Advanced editing tools, high-quality audio processing, industry-standard.
- User-Friendliness: Steeper learning curve, primarily favored by professionals but offers immense capabilities.
4. Logic Pro X
- Best For: Mac users and comprehensive music production.
- Features: Broad range of virtual instruments, excellent MIDI handling, integrated loops.
- User-Friendliness: User-friendly for those familiar with Apple products; packed with helpful features.
5. GarageBand
- Best For: Beginners and casual music makers on Mac.
- Features: Basic recording capabilities, simple interface, built-in sounds and loops.
- User-Friendliness: Extremely accessible; great starting point for newcomers to home recording.
Free vs. Paid Options
When choosing a DAW, don’t overlook free options like GarageBand or Audacity. They can be excellent entry points, allowing you to get comfortable with recording before investing in a paid suite. Conversely, investing in software like Ableton Live or Pro Tools can provide advanced features crucial for a higher quality of production.
Each DAW has its unique strengths, so consider your specific needs, preferred workflow, and the genres you create when making a selection. The right DAW will enhance your recording process and help bring your musical visions to life.
Home Recording Essentials: The Must-Have Gear List
Creating a home recording studio requires some essential gear to achieve quality results. Here’s a checklist of must-have equipment tailored for aspiring artists, along with budget-friendly options to consider.
1. Microphone
- Dynamic microphones: Great for loud sound sources, budget-friendly, and durable.
- Condenser microphones: Ideal for vocals and acoustic instruments, capturing subtle details.
2. Audio Interface
- A reliable audio interface acts as the bridge between your instruments and computer.
- Entry-level models offer decent quality without breaking the bank.
3. Studio Monitors
- Nearfield monitors provide accurate sound reproduction, essential for mixing.
- Budget options deliver satisfactory results without excessive price tags.
4. Digital Audio Workstation (DAW)
- A DAW is essential software for recording and editing.
- Many free and affordable DAWs are user-friendly for beginners while offering professional features.
5. Headphones
- Closed-back headphones are beneficial for monitoring recordings and mixing.
- Look for options that balance affordability with sound quality.
6. Acoustic Treatment
- Basic acoustic panels can minimize unwanted reflections, enhancing the recording environment.
- DIY treatments using foam or thick blankets can be cost-effective solutions.
By carefully selecting equipment, aspiring musicians can build an effective home studio setup that meets their recording needs while being mindful of their budget. Start with the essentials, and gradually expand your gear as your skills grow.
In conclusion, setting up a successful home recording environment requires careful consideration of various components, techniques, and tools. By understanding essential elements like audio interfaces, microphones, and digital audio workstations, you can create a space tailored to your unique needs. Employing best practices in recording techniques and addressing challenges through effective troubleshooting will significantly enhance your sound quality.
Investing time in acoustic treatment and selecting the right microphone can elevate your recordings to a professional level. Remember, the journey of home recording is as much about exploration as it is about technical knowledge.
With diligence, creativity, and the right guidance, you’ll be well on your way to mastering your craft. This comprehensive guide to home recording serves as a valuable resource for anyone eager to dive into the world of music production.
FAQ
Q: What are the essential components for a home recording setup?
A: Essential components include a quality microphone, an audio interface, monitoring speakers, and a Digital Audio Workstation (DAW) to facilitate recording and editing.
Q: How do the three stages of music production break down?
A: The three stages are preproduction, recording, and post-production, involving planning, capturing sound, and mixing and mastering the final product.
Q: What recording techniques can improve sound quality?
A: Key techniques include proper mic placement, gain staging, and monitoring your recordings to ensure clarity and balance.
Q: How can I choose the right microphone for home recording?
A: Dynamic microphones are better for loud sources, while condensers capture more detail in vocals and acoustics. Your choice depends on your recording needs.
Q: What are effective acoustic treatment and soundproofing techniques?
A: Utilize absorptive materials like foam panels and bass traps to minimize reflections, along with soundproofing panels to prevent sound leakage.
Q: How do I select a Digital Audio Workstation (DAW) for home recording?
A: Choose a DAW based on its features, ease of use, and compatibility with your audio interface and overall setup needs. Popular options offer diverse capabilities.
Q: What are some common issues in home recording and their solutions?
A: Common issues include microphone feedback, unwanted noise, and latency. Troubleshooting with proper techniques can greatly enhance the recording experience.