In an era where music creation is more accessible than ever, understanding the essentials of home recording can transform your creative journey. Whether you’re a budding musician or an aspiring producer, setting up your own home studio opens the door to endless possibilities.
From selecting the right equipment to mastering recording techniques, this essential guide covers everything you need to know to get started.
Dive into the world of home recording, where you’ll learn about must-have gear, effective studio setups, and best practices that enhance your sound quality. Get ready to unleash your musical potential from the comfort of your own space!
Basics of Home Recording Equipment
Home recording hinges on several essential pieces of equipment, each serving a critical role in creating high-quality audio.
Here’s a list of fundamental components needed for setting up your home studio:
Computer
Your computer acts as the backbone of your recording setup. It runs your Digital Audio Workstation (DAW) software, processes your audio signals, and stores your recordings. A machine with sufficient processing power and RAM is vital for smooth operation.Audio Interface
This device converts analog signals from instruments and microphones into digital data that your computer can process. A good audio interface enhances sound quality, ensures low latency, and allows multiple inputs for recording several sources simultaneously.Microphones
Choosing the right microphone is crucial for capturing sound. For recording vocals and acoustic instruments, you’ll typically choose between:
- Dynamic Microphones: Durable and great for loud sounds, dynamic mics are perfect for live performances and certain studio situations.
- Condenser Microphones: Sensitive and detailed, these are ideal for vocals and less loud instruments, providing a rich sound profile.
Studio Monitors
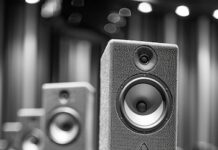
Studio monitors deliver accurate sound reproduction, crucial for mixing and mastering. They provide a flat frequency response, which helps you make better decisions while tweaking your tracks.Cables and Stands
Quality cables are often overlooked but essential for connecting equipment without signal loss. Mic stands help stabilize microphones, ensuring consistent capture during recording sessions.Headphones
A good pair of closed-back headphones is indispensable for monitoring audio during recording sessions, allowing you to hear detail without unwanted feedback from external speakers.MIDI Controller
This device allows you to trigger sounds and control virtual instruments in your DAW. MIDI controllers vary in complexity, from simple keyboards to advanced pads and faders.Pop Filter
A pop filter is used in front of microphones to reduce plosive sounds, enhancing the clarity of recorded vocals.
By investing in quality equipment that fits within your budget, you set the stage for a successful home recording journey. Understanding the purpose of each component helps build a foundation for effective music production.
Setting Up Your Home Recording Studio
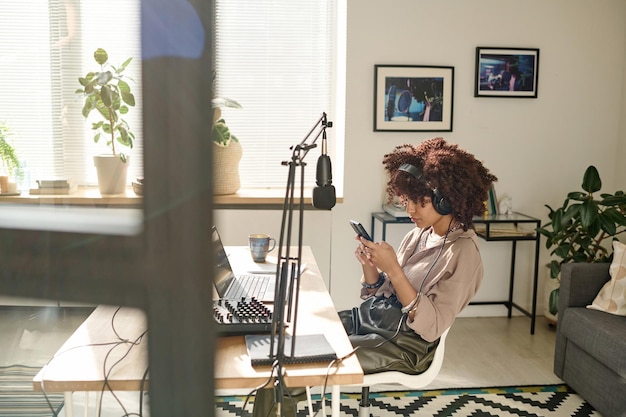
Setting up your home studio starts with selecting an appropriate space. Look for a quiet room free from distractions. Ideally, it should be around 100 square feet, allowing ample room for your recording equipment and mobility during sessions.
Arrange your physical space thoughtfully. Place your studio monitors at ear level, equidistant from your listening position. This setup promotes optimal sound reproduction and helps you achieve a balanced mix.
For effective sound quality, consider acoustic treatment. Use materials like foam panels, bass traps, and even carpets to minimize unwanted reflections and echoes. Experiment with furniture arrangement to create a more acoustically friendly environment—bookshelves and curtains can also contribute to better sound absorption.
When planning your DIY home recording studio, make sure all necessary equipment is easily accessible without creating clutter. Essential pieces include a computer, audio interface, microphones, and cables. Each component plays a vital role in the recording process, so ensure that everything is in place before starting your sessions.
Lastly, plan your recording sessions with care. Organize your workspace for efficiency and comfort. This preparation allows you to focus on creativity without worrying about technical setbacks. Emphasizing these foundational aspects ensures a successful and enjoyable home recording experience.
Home Recording Software (DAWs) Basics
Digital Audio Workstations (DAWs) are essential for anyone looking to produce music at home. These software platforms facilitate recording, editing, and mixing audio, forming the backbone of modern music production.
Many DAWs offer free versions, making them accessible for beginners. While exploring options, pay attention to features such as track count, MIDI capabilities, built-in effects, and user interface design, as these factors significantly affect your workflow.
Popular DAWs include:
GarageBand: A fantastic entry-level option for Mac users that offers a user-friendly interface and solid features for recording and mixing.
Audacity: Open-source software favored for its simplicity and useful editing features. It supports multiple platforms and works well for basic audio tasks.
FL Studio: Known for its intuitive workflow, especially among electronic music producers. It includes numerous virtual instruments and effective mixing tools.
Ableton Live: Ideal for both studio recording and live performance, it features a unique session view for creative arrangements and spontaneous composition.
Pro Tools: Regarded as the industry standard, it excels in editing and mixing capabilities, making it popular among professionals.
When selecting a DAW, consider what resonates with your creative process. Some users prefer linear timelines, while others thrive in loop-based setups. Ensuring compatibility with your computer’s operating system and hardware is crucial for smooth operation.
To make the most of your DAW, mastering basic mixing and mastering techniques is essential. Understanding how to balance levels, apply EQ, and use compression can elevate the quality of your recordings.
Experimenting with built-in plugins and effects can lead to unique soundscapes and enrich your production experience.
Investing time in learning your DAW thoroughly will yield significant rewards, transforming your home recording into a professional sound space.
Recording Techniques for Beginners
Mastering recording techniques is essential for capturing quality audio, whether you’re recording vocals or instruments.
Here are some fundamental tips to get you started:
Mic Placement: Positioning your microphone correctly can drastically affect your sound. For vocals, place the mic about 6 to 12 inches away, ensuring the singer feels comfortable. For instruments, position the mic close enough to capture detail without overwhelming it. Experimentation is key—adjust until the desired tone is achieved.
Monitoring Levels: Always keep an eye on your recording levels. Aim for levels that peak around -12 dB to -6 dB to avoid distortion. Review the recorded sound while listening closely to ensure clarity and balance.
Room Acoustics: The space you record in greatly influences sound quality. Avoid rooms with hard surfaces that cause echo and reverberation. Use soft furnishings, rugs, or even dedicated acoustic panels to treat the space.
Common Pitfalls:
- Poor Mic Positioning: Placing the mic too far from the sound source can result in a dull recording. Always check your placement.
- Ignoring Sound Levels: Failing to monitor levels can lead to clipping or too soft recordings. Use your DAW’s metering tools effectively.
- Layering Tracks: When recording multiple instruments, layer them one at a time. This helps maintain clarity in the mix and allows you to focus on each sound without distractions.
By implementing these techniques, you’ll not only enhance your recordings but also build a strong foundation for future projects. Avoiding common mistakes will lead to smoother sessions and better results.
Tips for Home Studio Acoustic Treatment
Proper acoustic treatment is vital for achieving a cleaner mix by reducing unwanted sound reflections in your home studio. Here are key strategies to enhance your recording environment:
Use Acoustic Panels: Install acoustic panels on walls, particularly at first reflection points. These absorptive panels help minimize echo and reverb, making your recordings sound more professional.
Implement Bass Traps: Corners of the room often accumulate bass frequencies. Installing bass traps in these areas helps control low-end muddiness, resulting in a more balanced sound.
Choose Soundproofing Materials: While complete soundproofing can be challenging, using heavy curtains, rugs, or specialized materials can significantly reduce outside noise interference.
Strategic Placement: Arranging your acoustic treatment strategically is crucial. Aim for panels at reflection points, such as where sound first reflects off the walls before hitting your ears, and don’t forget the ceiling!
Monitor Placement: Ensure your studio monitors are placed at ear level and away from corners to prevent sound coloration. This setup enables a better sound stage and clearer audio representation.
Evaluate Room Dimensions: The shape and size of your room can affect how sound behaves. If possible, opt for a rectangular room, avoiding perfectly square spaces, which can lead to unwanted standing waves.
By applying these tips, you’ll create a more accurate and reliable listening environment, paving the way for high-quality recordings.
Organizing Your Recording Space
An organized recording space significantly enhances workflow and efficiency during sessions.
Start by choosing furniture that promotes both comfort and functionality.
Consider a sturdy desk that accommodates your computer, audio interface, and other equipment while leaving space for writing or note-taking.
Here are a few home studio furniture ideas to consider:
- Adjustable desk: Allows you to work while standing or sitting.
- Ergonomic chair: Important for long sessions to ensure comfort.
- Storage solutions: Racks or shelves for easy access to microphones, cables, and other gear.
Effective cable management is crucial to maintaining an organized space.
Use cable ties or sleeves to keep wires neat and prevents tangling.
Label your cables to easily identify connections, further streamlining your setup.
Accessibility of equipment is vital, especially if you collaborate with others.
Ensure all tools are within reach for seamless workflow.
If space allows, set up a designated area for instruments or performance, enhancing creative collaboration.
Maintaining a tidy environment not only fosters creativity but also makes your recording sessions more productive.
As you embark on your home recording journey, remember that understanding the basics of home recording is crucial to your success.
With the right equipment, a well-planned studio environment, and a grasp of fundamental recording techniques, you can create professional-sounding tracks from the comfort of your own space.
By paying attention to the essentials—from selecting your audio interface and DAW to understanding microphone types and placing them correctly—you are building a solid foundation for your music production endeavors.
Don’t forget to refine your mixing and mastering skills while staying mindful of common mistakes to improve the overall quality of your recordings.
Ultimately, the basics of home recording equip you with the tools and knowledge necessary for artistic expression and sonic clarity. So dive in, experiment, and let your creativity flourish!
FAQ
Q: What are the essential equipment items for home recording?
A: The essential items for home recording include a computer, audio interface, studio monitors, one or two microphones, cables, a mic stand, and recording software.
Q: How do I set up a home studio for the best sound quality?
A: To optimize sound quality, choose a quiet space, ensure proper monitor placement, and incorporate acoustic treatment to minimize unwanted reflections and enhance clarity.
Q: What should I consider when choosing an audio interface and DAW?
A: When selecting an audio interface, consider its compatibility with your devices. For DAWs, evaluate user-friendliness and features that suit your recording needs.
Q: What types of microphones are best for home recording?
A: Dynamic microphones are ideal for loud sounds, like drums, while condenser microphones excel at capturing vocals. Consider their placements for optimal results.
Q: What recording techniques should beginners focus on?
A: Beginners should practice multi-track recording, layering tracks, and sound manipulation basics within a DAW to enhance audio quality and creativity.
Q: How can I improve mixing and mastering my tracks?
A: Focus on balancing levels, applying EQ, and managing dynamics during mixing. For mastering, use tools that enhance the overall sound quality of your tracks.
Q: What common mistakes should I avoid in home recording?
A: Avoid poor microphone placement, neglecting room treatment, and overlooking levels and dynamics, which can lead to subpar recordings.