If you’re an aspiring music producer looking to dive into the world of digital audio workstations, PreSonus Studio One might just be your perfect launchpad. This beginner’s guide explores the essentials of Studio One, a user-friendly platform that balances simplicity with powerful features. Whether you’re creating your first track or mixing your latest masterpiece, Studio One provides the tools you need—like intuitive virtual instruments, effects, and a responsive mixing console—all designed to make your experience seamless and enjoyable. In this guide, you’ll uncover how to set up the software, navigate its interface, and begin crafting your own unique sound. Let’s get started on your musical journey!
Beginner’s Guide for PreSonus Studio One: Overview
PreSonus Studio One is an intuitive digital audio workstation (DAW) crafted for both novice and seasoned music producers.
This DAW is known for its user-friendly design, which helps beginners navigate various features without feeling overwhelmed.
Key aspects include drag-and-drop functionality, allowing users to easily arrange audio and MIDI tracks with minimal hassle.
Additionally, built-in virtual instruments and effects expand creative options without requiring extra purchases, making it accessible for those just starting out.
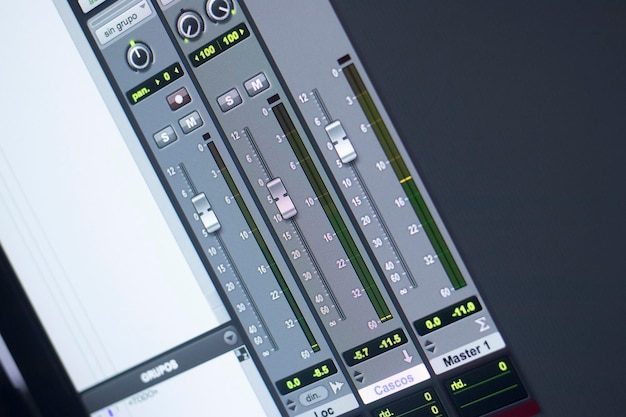
The robust mixing console offers detailed control over sound and simplifies the mixing process, catering to users looking to achieve professional-quality results.
Studio One’s interface complements its versatile capabilities, providing new users with an organized layout where essential tools are readily available.
As beginners dive into music production activities like audio recording and MIDI integration, they will appreciate the seamless workflow that Studio One’s design creates.
Furthermore, ongoing updates from PreSonus consistently enhance functionality, ensuring that users have access to the latest tools and features for their creative endeavors.
In essence, PreSonus Studio One serves as a comprehensive platform, designed to bridge the gap between beginner experiences and advanced production techniques while fostering a supportive environment for music creation.
Setting Up Studio One: Your First Steps
Getting started with PreSonus Studio One involves a few critical steps to ensure a smooth experience.
Begin by installing the software, following the guidelines laid out during the setup process. Make sure your system meets the necessary requirements for optimal performance.
Once the installation is complete, it’s crucial to configure your audio interface correctly. This step is vital for latency-free listening and recording. Most audio interfaces require you to select the appropriate driver in Studio One. Head to Options > Audio Setup, and choose your audio interface from the dropdown list. This allows the software to communicate effectively with your hardware.
After your audio interface is set up, create your first project. Here’s a straightforward approach:
- Open Studio One.
- Click on Create a New Song.
- Set your project name and location.
- Select a template based on the type of music you’re producing or start with an empty song.
This minimal setup allows you to focus on beginning essentials like track creation.
To add tracks, simply click the Add Track button, select the track type, and configure its inputs. You can record audio or MIDI by engaging the record button when ready.
Don’t overlook the built-in tutorials right within Studio One. These resources are designed for beginners, helping to explain various functionalities and workflows.
Additionally, consider creating a simple test project where you can practice recording audio and MIDI, applying effects, and using the mixer.
Remember, every project you create is an opportunity to explore the depth of Studio One’s features, establishing a solid foundation for your music production journey.
Feel free to experiment and make use of community forums for any questions or advice as you navigate through your early steps in Studio One.
Studio One Interface Overview for Beginners
PreSonus Studio One showcases an intuitive interface that simplifies navigation for newcomers. Understanding the layout can significantly enhance your workflow.
Main Components of the Interface
The Arrangement Window: This is where your project comes to life. It displays tracks and allows for easy editing, arranging, and mixing.
Control Bar: Located at the top, this toolbar provides quick access to essential functions such as transport controls, recording options, and metering displays.
Inspector Panel: Found on the left, the inspector provides a detailed view of the selected track’s settings, enabling fine-tuning of effects and parameters.
Mixer: The mixer interface is crucial for balancing audio levels and adding effects. It usually opens through a simple toggle, allowing for a smooth transition between editing and mixing.
Browser: The browser on the right side is your gateway to files, instruments, and effects. It allows for easy drag-and-drop actions directly into your arrangement.
Customizing Your Workspace
Customization is straightforward in Studio One, allowing you to tailor the workspace to suit your workflow.
Rearranging Windows: You can drag and reposition panels to create an arrangement that feels comfortable.
Saving Layouts: After customizing, save your layout for quick access in future sessions.
Keyboard Shortcuts: Familiarize yourself with keyboard shortcuts to speed up your process, allowing you to navigate more efficiently without relying solely on the mouse.
By grasping the layout and functionality of the Studio One interface and customizing it to your liking, you can streamline your workflow and make music production a more enjoyable and efficient experience.
Audio Recording Techniques in Studio One
To ensure high-quality audio recordings in Studio One, it’s vital to understand both the basic techniques and best practices involved. This knowledge not only enhances the recording process but also contributes significantly to the overall quality of your music projects.
First, setting up your tracks properly is crucial. Always create a new audio track for each sound source. Ensure that you adjust the input settings to correspond with your audio interface. This can usually be done in the mixing console or track inspector. Pay attention to the input levels; aim for a strong signal without peaking, which can lead to distortion.
When recording vocals, consider the microphone placement and the environment you’re in. A quiet space, with minimal background noise, is ideal. Utilize pop filters to reduce plosive sounds and maintain a consistent distance from the microphone for the best sound capture. Studio One offers various tools for vocal processing, including pitch correction and harmonization, which can come in handy during post-production.
Here are some best practices for recording in Studio One:
Use Headphones: Always wear headphones while recording to prevent audio bleed from the speakers into the microphone.
Monitor Input Levels: Regularly check input levels to ensure you’re not distorting the sound.
Utilize Click Tracks: If you’re working with multiple instruments, use a metronome or click track to stay on tempo.
Record in Takes: Instead of aiming for a perfect single take, record multiple takes. This gives you options to choose the best parts during editing.
Experiment with Effects: Don’t hesitate to apply some effects while recording, such as compression or EQ, to get a better feel for your sound while tracking.
By focusing on these techniques and utilizing the tools within Studio One effectively, you can enhance your audio recording experience, making it both efficient and enjoyable.
MIDI Editing Fundamentals in Studio One
MIDI editing in PreSonus Studio One opens a world of possibilities for music composition, allowing beginners to manipulate MIDI data skillfully.
Start by creating a MIDI track in your project. This can be done by selecting the “Add Tracks” option and choosing MIDI. Once you’re set up, the piano roll is your go-to for editing. It provides a clear view of your MIDI notes, where you can easily adjust note length, pitch, and velocity.
When working with virtual instruments, Studio One’s built-in options enhance creativity. Use the Instrument Browser to load various virtual instruments into your MIDI track. Each instrument can be tailored to fit your musical vision, from lush strings to punchy synths.
You can also experiment with MIDI orchestration in Studio One. Layer multiple MIDI tracks to build a fuller sound. Simple techniques like copying and pasting notes can create harmony and depth. The ability to harmonize parts or create counter-melodies can transform your musical ideas into complex arrangements.
Another key aspect is using the MIDI editor’s quantization feature. This alignment tool ensures your notes are in sync with the beat. It’s particularly helpful for correcting timing issues, making your performance sound more polished.
To enhance your MIDI editing workflow, don’t forget about the drag-and-drop functionality. You can easily move MIDI notes around in the piano roll with just a click.
For beginners, taking advantage of Studio One’s MIDI editing capabilities will not only empower you to create intricate compositions but also build a solid foundation for more advanced music production techniques. Your journey into the world of music improvisation and composition begins here, with the straightforward yet powerful tools of Studio One at your fingertips.
Mixing Techniques for Beginners in Studio One
Understanding the fundamentals of audio mixing is crucial for achieving professional sound quality in your tracks.
Beginner mixers should focus on the key techniques that can elevate their mixing game in Studio One.
Here are essential mixing techniques to get you started:
- Volume Balancing
- Start with your tracks at a balanced volume.
- Use faders to adjust levels, ensuring no individual track overwhelms others.
- Pan Control
- Utilize stereo panning to create space in your mix.
- Distribute your instruments across the stereo field, keeping your mix dynamic.
- Use of EQ
- Equalization (EQ) helps you carve out space for each instrument.
- Cut unwanted frequencies and boost essential ones to enhance clarity.
- Incorporating Effects
- Experiment with reverb and delay to add depth.
- Apply effects judiciously; too much can muddle the mix.
- Compression Techniques
- Compression evens out levels, ensuring more consistent dynamics.
- Understand the ratio, attack, and release settings for optimal results.
- Automation
- Automate volume, panning, and effects to maintain listener interest.
- Dynamic changes throughout the song can enhance emotional impact.
- Referencing
- Compare your mix with professional tracks to gauge quality.
- This helps identify areas for improvement and inspires your mixing decisions.
- Mixing in Stages
- Tackle mixing stage by stage: start with levels, then EQ, and finally effects.
- This systematic approach can prevent feeling overwhelmed.
- Finalizing Your Mix
- Once satisfied, listen on different sound systems for consistency.
- Make minor adjustments based on these playback tests.
By mastering these mixing techniques in Studio One, beginners can develop a solid foundation that encourages creativity while achieving polished, professional sound in their tracks.
Troubleshooting Common Issues in PreSonus Studio One
Beginners often encounter technical hurdles when starting with Studio One, but understanding a few common issues can ease the learning curve.
Audio Latency
Audio latency can be a frustrating problem, especially during recording sessions. To minimize latency, adjust the audio buffer size in the settings. A lower buffer size reduces delay but may cause glitches if your computer struggles to keep up.
Software Crashes
If Studio One crashes unexpectedly, ensure that your software is updated to the latest version. This often resolves compatibility issues and bugs. Additionally, check if your system meets the necessary requirements for optimal performance.
Hardware Connectivity Problems
For those using external audio interfaces, connectivity issues can arise. Always make sure your drivers are up-to-date. Disconnect and reconnect devices if you experience drops in audio or other performance issues.
Engaging with the User Community
Don’t hesitate to reach out to the Studio One user community. These forums are teeming with tips and solutions from other users who have faced similar challenges. Engaging with fellow beginners can provide support and foster a sense of camaraderie.
Educational Resources
Utilizing educational resources can also significantly enhance problem-solving skills. Look for tutorials or webinars that address specific challenges or explore troubleshooting techniques in-depth. Many creators share their experience online, making these resources invaluable for newcomers.
With patience and persistence, you’ll navigate the common challenges of Studio One and uncover its full potential for your music production journey.
In conclusion, embarking on your music production journey with PreSonus Studio One can be a fulfilling experience, especially for beginners eager to explore their creativity. By understanding the software’s intuitive interface and essential features, you’ll be well-equipped to create, edit, and produce music effectively.
Setting up the software correctly, mastering audio recording techniques, and leveraging Studio One’s powerful tools will help streamline your workflow. Additionally, knowing how to troubleshoot common issues gives you the confidence to navigate challenges seamlessly, ensuring a smoother creative process.
To enhance your skills further, the wealth of online resources and community support available can be invaluable.
Ultimately, with this Beginner’s Guide for PreSonus Studio One, you have the foundation needed to thrive in your music-making endeavors. Enjoy the journey of creating and sharing your unique sound!
FAQ
Q: What are the key features of PreSonus Studio One?
A: PreSonus Studio One offers an intuitive interface, drag-and-drop functionality, built-in virtual instruments, seamless audio recording, and a comprehensive mixing console, making it suitable for all users.
Q: How can I set up my first project in Studio One?
A: Begin by creating a new project, adding audio or MIDI tracks, and using the drag-and-drop feature to arrange your music, following basic audio recording techniques.
Q: What should beginners know about the user interface of Studio One?
A: Studio One’s user interface is designed for ease of use, featuring clearly labeled sections and tools that help users navigate the software without feeling overwhelmed.
Q: Are there built-in resources to help learn Studio One?
A: Yes, Studio One includes tutorials and documentation that provide step-by-step guidance, helping beginners understand essential functionalities and workflows effectively.
Q: How can I troubleshoot common issues in Studio One?
A: To troubleshoot, users should check audio latency, ensure hardware connectivity, and refer to community forums for support. Optimization tips can further enhance performance.
Q: What types of online resources are available for learning Studio One?
A: Numerous online resources exist, including video tutorials, walkthroughs, and community forums where beginners can share experiences and ask questions to expand their skills.
Q: What are the basic recording techniques in Studio One?
A: Basic recording techniques involve selecting the correct track type, setting levels, enabling monitoring, and utilizing the software’s intuitive tools for recording audio and MIDI.